
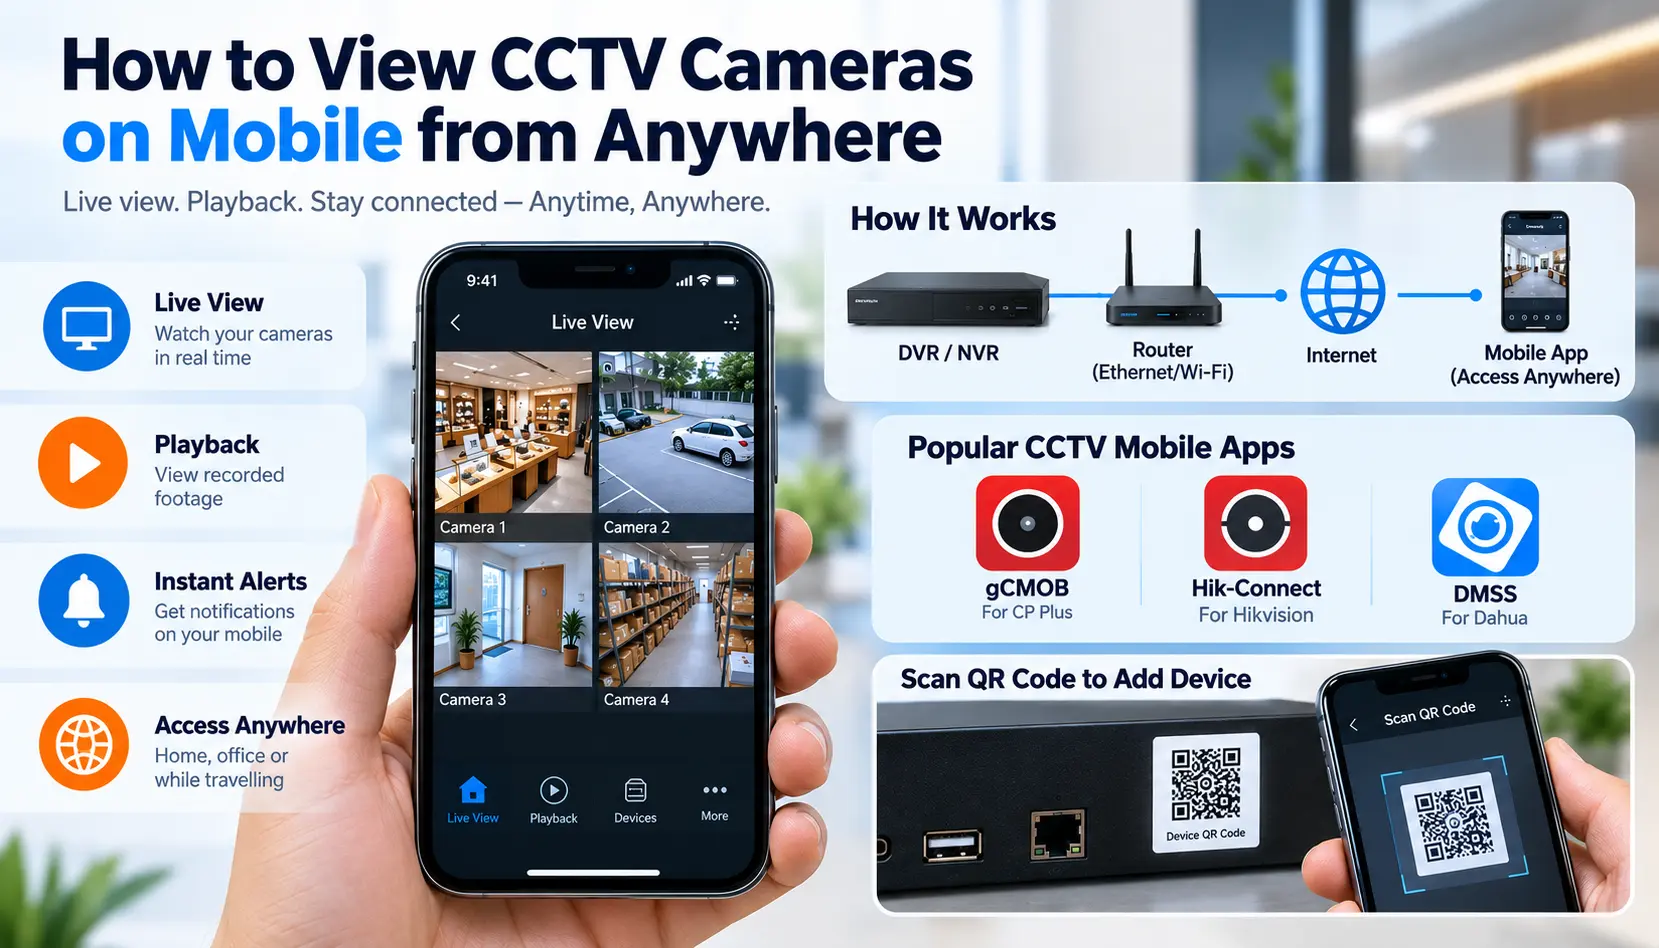
Being able to check your cameras from your phone — whether you are at work, on holiday, or just in another room — is one of the biggest advantages of a modern CCTV system. Most DVRs, NVRs, and IP cameras sold today support remote viewing out of the box. The setup usually takes a few minutes, as long as you follow the right steps in order.
This guide from Smart Secures walks you through the most reliable ways to view your CCTV cameras on mobile from anywhere, plus how to keep that access secure.
- What You Need Before You Start
- Method 1: Use the Manufacturers Mobile App (P2P) — Easiest Option
- Method 2: DDNS with Port Forwarding — For Older Systems
- Method 3: Cloud Storage and Web Portal Access
- Testing Your Setup Properly
- Keeping Remote Access Secure
- Troubleshooting Common Issues
- FAQs
- Conclusion
What You Need Before You Start
- A CCTV system (DVR, NVR, or standalone IP cameras) already connected to your local network
- An active internet connection at the installation site
- A smartphone (Android or iOS)
- The serial number, QR code, or model details of your recorder or camera — usually printed on a sticker on the device
Method 1: Use the Manufacturers Mobile App (P2P) — Easiest Option
Most modern systems use P2P (peer-to-peer) technology, which lets you connect to your cameras without touching your router settings at all.
1. Download the app that matches your device brand (common examples include Hik-Connect, EZVIZ, XMEye, V380 Pro, and CamHi).
2. Create an account and open the app.
3. Add your device by scanning the QR code on the recorder or camera, or by entering the serial number/UID manually.
4. Enter the login credentials you set during installation (avoid leaving the default admin password in place).
5. Enable push notifications if you want motion alerts sent straight to your phone.
Once added, the camera will appear in your apps device list and stream live video over Wi-Fi or mobile data.
Method 2: DDNS with Port Forwarding — For Older Systems
Older DVRs that do not support P2P need a slightly more manual setup:
1. Log in to your router (usually at 192.168.1.1) using your browser.
2. Open the Port Forwarding or NAT section.
3. Forward the HTTP port (commonly 80 or 443) and the RTSP port (commonly 554 or 8554) to your recorders local IP address.
4. Set up a Dynamic DNS (DDNS) hostname if your internet provider does not give you a fixed public IP — this gives your system a consistent address even if your IP changes.
5. In your mobile app, choose "IP/Domain" instead of P2P, then enter your DDNS address or public IP with the correct port.
This method gives you more control but requires comfort with router settings, and it is worth asking your installer for help if you are not familiar with networking.
Method 3: Cloud Storage and Web Portal Access
Many newer systems now offer cloud-based storage in addition to local recording. With this setup, you log into a web portal or app using your account credentials rather than your devices IP address directly — the manufacturers cloud servers handle the connection for you. This is often the simplest option for multi-site businesses that want to check several locations from one dashboard.
Testing Your Setup Properly
Do not assume remote viewing works just because it looks fine on-site. To confirm it is genuinely accessible from anywhere:
- Turn off your phones Wi-Fi and switch to mobile data
- Open the app away from the properties network
- Confirm you can see a live feed, not just a cached image
- Check playback of recorded footage, not just the live view
Keeping Remote Access Secure
Remote viewing is convenient, but it also means your camera feed is reachable over the internet. A few habits keep that access safe:
- Change default passwords immediately after installation — "admin/admin" is the first thing an attacker tries
- Keep firmware updated on both the camera/recorder and the mobile app
- Use two-factor authentication if your app or cloud portal supports it
- Avoid exposing your recorder directly to the internet without P2P, cloud access, or a VPN — raw port forwarding without other protections is the riskiest option
- Review connected devices in your app periodically and remove any you do not recognise
Troubleshooting Common Issues
- App shows "offline": check that the recorder still has power and internet, and that your router has not changed its assigned IP address
- Live view is slow or freezes: this is usually an upload-speed issue at the property, not a problem with your phone
- Can not add the device: double-check the serial number/QR code, and confirm the recorders firmware supports the app version you are using
- Works on Wi-Fi but not on mobile data: this usually points to a port forwarding or DDNS misconfiguration if you are not using a P2P system
Frequently Asked Questions
Conclusion
Smart Secures sets up secure, reliable remote access as part of every CCTV installation, so you can check your property from anywhere without worrying about who else can.
