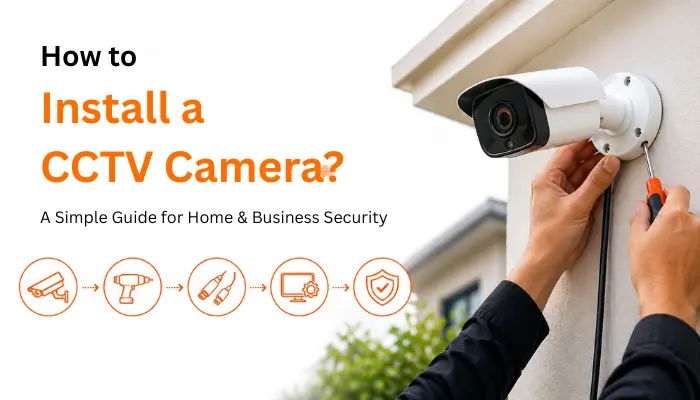
In 2026, security systems are more advanced and affordable than ever. With AI-powered features, 4K video, and smart detection, modern CCTV cameras offer reliable protection for homes and businesses. Whether for safety or peace of mind, installing your own system is now easier than ever.
This comprehensive guide walks you through everything you need to know about CCTV camera installation — from choosing the right system to mounting your first camera and configuring advanced features.
- Wired vs Wireless CCTV — Which Should You Choose?
- What Equipment Do You Need for CCTV Installation?
- Step 1: Plan Your Camera Placement Strategy
- Step 2: Pre-Installation Setup and Testing
- Step 3: Mount and Install Your Cameras
- Step 4: Set Up Your NVR/DVR System
- Step 5: Advanced Configuration and Optimization
- Step 6: Testing and Fine-Tuning
- Common CCTV Installation Mistakes to Avoid
- Maintenance Tips for Long-Term Performance
- CCTV Installation Cost in Hyderabad
- Hyderabad-Specific Installation Tips
- 2026 Technology Trends to Consider
- Frequently Asked Questions
- Final Thoughts
Wired vs Wireless CCTV — Which Should You Choose?
Before you pick up a drill, you need to decide which type of security camera system best fits your needs.
Wired CCTV Systems (PoE Cameras)
Wired cameras use physical cables for both power and data transmission. Modern systems typically use Power over Ethernet (PoE), which combines both functions into a single cable.
✅ Pros of Wired Security Cameras
Rock-solid reliability:
No Wi-Fi interference or signal drops.
Superior security:
Encrypted Ethernet connections are harder to hack than wireless signals.
Higher video quality:
Supports 4K-8K+ resolutions without bandwidth constraints.
Long-range capability:
Ethernet cables can transmit data up to 100 metres.
❌ Cons of Wired CCTV Installation
Complex installation:
Requires drilling, cable routing, and potentially professional help.
Less flexible:
Moving cameras means re-running cables.
Power outage vulnerability:
Needs UPS backup to function during outages.
Less aesthetically pleasing:
Visible cables may not suit all homes.
Best for: Permanent installations, large properties, commercial buildings, and anyone prioritising reliability and security over convenience.
Wireless CCTV Systems
Wireless CCTV cameras transmit video via Wi-Fi or radio signals and are powered by batteries, solar panels, or nearby outlets.
✅ Pros of Wireless Security Cameras
Easy installation:
No extensive cabling required — perfect for DIY enthusiasts.
Flexible placement:
Easily relocate cameras as your needs change.
Cleaner aesthetics:
No visible cables means a tidier appearance on walls and ceilings.
Power outage operation:
Battery-powered models continue working when the power goes out.
Rental-friendly:
Ideal for apartments or rental properties.
❌ Cons of Wireless CCTV System
Signal interference:
Wi-Fi can be disrupted by walls, electronics, or weather.
Limited range:
Typically effective only within Wi-Fi coverage area.
Battery maintenance:
Requires recharging every 2–6 months depending on usage.
Security vulnerabilities:
Wireless signals can potentially be intercepted.
Bandwidth limitations:
Usually maxes out at 720p–2K resolution.
Best for: Renters, temporary installations, small properties, and situations where running cables is impractical.
The Hybrid Approach
Many homeowners opt for a hybrid security system — using wired cameras for critical areas (front door, driveway) and wireless cameras for secondary locations (backyard shed, side gate). Modern NVRs can manage both types through a single interface.
What Equipment Do You Need for CCTV Installation?
🔧 Essential Tools
- Power drill with drill bits (3/16" to 1/4")
- Screwdriver set (Phillips and flathead)
- Ladder (6–8 feet for most residential installations)
- Pencil or marker for marking drill points
- Level (to ensure cameras are not crooked)
- Fish tape or wire pulling tools (for wired systems)
- Cable clips or conduit (for outdoor wiring)
🛠️ Optional But Helpful Tools
- Stud finder (for securing mounts to wall studs)
- Voltage tester (for wired installations)
- Caulk and sealant (to weatherproof outdoor installations)
- UV-rated conduit (protects cables from sun damage)
- Smartphone or tablet (for setup and testing)
📦 Camera System Components
- Security cameras (dome, bullet, or PTZ style)
- NVR (Network Video Recorder) or DVR (Digital Video Recorder)
- PoE switch (for wired systems with multiple cameras)
- Hard drive for video storage (2TB to 6TB recommended)
- Cables — Cat6 Ethernet for PoE cameras, or power cables for wireless
- Mounting brackets and hardware (usually included with cameras)
Step 1: Plan Your Camera Placement Strategy
Strategic camera placement is the difference between a real security system and one with blind spots. Here is how to cover your property effectively.
Priority Locations for Home
- Front door — 70% of burglars enter through the front or back door
- Back door and side doors
- Ground-floor windows (especially those hidden from street view)
- Driveway — position to capture number plates
- Garage and detached buildings
- Main stairway or hallway
- Backyard and side gates
Priority Locations for Business
- Front entrance and reception area
- Back entrances and loading docks
- Cash registers and point-of-sale areas
- Inventory storage and stock rooms
- Parking lots and employee entrances
- Server rooms and critical infrastructure
- Hallways and elevator lobbies
📏 Height Matters
Mount cameras 8–10 feet high for optimal coverage. This height prevents easy tampering, provides a wider field of view, and still captures facial details when angled correctly.
Corner Strategy
Mounting cameras on building corners maximises coverage. A camera with a 3.6mm lens (90-degree view) in a corner can monitor two walls simultaneously, eliminating blind spots.
💡 Lighting Considerations
- Avoid pointing cameras directly at the sun
- Combine infrared night vision with motion-activated LED lights
- Look for cameras with HDR to handle glare and backlighting
🔒 Privacy and Legal Compliance
- Never place cameras in bathrooms or bedrooms
- Avoid pointing cameras at neighbours windows or yards
- In commercial settings, display CCTV signage
- Check local regulations before installing
Step 2: Pre-Installation Setup and Testing
💡 Pro tip: Complete all software setup and testing before you climb a ladder or drill any holes.
For Wireless CCTV Cameras
1. Download the manufacturer app on your smartphone
2. Create an account and follow the setup wizard
3. Power on the camera at ground level
4. Connect to Wi-Fi using the app (most cameras use QR code scanning)
5. Test the connection by viewing the live feed
6. Temporarily mount the camera at its intended location with tape
7. Check signal strength and video quality through the app
8. If successful, proceed with permanent mounting
For Wired PoE Cameras
1. Connect the camera to your PoE switch or NVR using an Ethernet cable
2. Power on the system and ensure the camera is detected
3. Access the camera feed through your NVR software or web browser
4. Assign a fixed IP address to each camera on your local network
5. Test video quality and adjust settings as needed
6. Temporarily position the camera to verify coverage area before mounting
Step 3: Mount and Install Your Cameras
🏗️ Outdoor Camera Installation
- Mark the drill points using the mounting bracket template
- Drill pilot holes — use a 3/16" or 1/4" bit; use masonry bit for brick or concrete
- Insert wall anchors if not drilling into studs
- Attach the mounting bracket with stainless steel screws to prevent rust
- Connect the camera — run Ethernet cable through wall for wired; charge battery for wireless
- Attach the camera to the mount and tighten securely
- Adjust the angle to frame your coverage area properly
☔ Weatherproofing Checklist
- Apply silicone caulk around cable entry points to prevent water intrusion
- Use UV-rated conduit to protect cables from sun damage
- Choose cameras with IP65 or IP67 rating for weather resistance
- In humid climates, opt for all-metal housings to prevent corrosion
- Install cameras under eaves or awnings when possible for added protection
🏠 Indoor Camera Installation
- Choose a corner location 8–10 feet high for maximum coverage
- Mount using the bracket as described above
- Ensure Wi-Fi signal is strong (for wireless cameras)
- Aim cameras away from windows to avoid night vision glare from glass reflections
- Plug in or connect according to your camera type
Step 4: Set Up Your NVR/DVR System
Your NVR or DVR is the brain of your system — storing footage and managing cameras.
🖥️ Physical Setup
1. Position your NVR in a secure, climate-controlled location near your router
2. Install the hard drive — a 2TB drive stores about 7–14 days of footage from 4 cameras at 1080p
3. Connect cameras to the NVR via PoE ports or PoE switch
4. Connect NVR to your router via Ethernet for remote access
5. Plug in the power supply and turn on the NVR
⚙️ Software Configuration
1. Connect a monitor to your NVR (HDMI or VGA)
2. Set administrator password, date/time, and name each camera by location
3. Configure recording — 24/7 continuous or motion-activated
4. Enable H.265+ compression to double storage efficiency
5. Set up motion detection zones around doorways and walkways
6. Enable remote access via mobile app with strong password and two-factor authentication
Step 5: Advanced Configuration and Optimization
🤖 AI-Powered Features
- Person vs Vehicle Detection: Cameras differentiate between humans, vehicles, and animals
- Package Detection: Get alerts when deliveries arrive at your doorstep
- Facial Recognition: Create watchlists for specific individuals (check local privacy laws)
- Line Crossing Detection: Alerts when someone crosses a virtual boundary
- Loitering Detection: Notifies if someone lingers in an area too long
🌙 Night Vision Types
- Infrared (IR): Standard on most cameras, black-and-white footage
- Dual-Light: Warm LED lights for full-colour night vision
- Starlight: Ultra-sensitive sensors capture colour in very low light
- Anti-fog: Automatically heats the lens in humid conditions
🔐 Network Security Checklist
- Change default passwords immediately
- Enable two-factor authentication on all accounts
- Create a separate VLAN for cameras
- Disable UPnP on your router
- Keep firmware updated regularly
- Use a VPN for remote access instead of port forwarding
Step 6: Testing and Fine-Tuning
🧪 Comprehensive System Test
- Walk through all camera coverage areas while watching the live feed
- Test motion detection by walking through detection zones
- Verify night vision by testing cameras after dark
- Check mobile app functionality from outside your home network
- Review recorded footage to ensure quality is acceptable
- Adjust camera angles to eliminate blind spots
🗺️ Coverage Mapping
Create a simple diagram of your property and mark camera locations, fields of view, overlap zones, blind spots, and all entry and exit points.
What Are the Most Common CCTV Installation Mistakes?
Mounting cameras too low
Low-mounted cameras are easy to disable or vandalize. Always mount at 8–10 feet minimum.
Pointing cameras at the sun
Creates glare and washes out footage. Always check sun direction before fixing camera position.
Forgetting to weatherproof
Outdoor cameras can fail within months without proper sealing. Always seal cable entry points with silicone.
Using weak passwords
Default credentials are the number one reason security cameras get hacked. Always change passwords immediately after setup.
Not testing before mounting
Discovering connectivity issues after drilling holes is frustrating. Always test first at ground level.
Insufficient storage
Running out of hard drive space means losing critical footage. Always plan storage based on camera count and retention days needed.
Maintenance Tips for Long-Term Performance
📅 Monthly Tasks
- Clean camera lenses with a microfiber cloth
- Check for loose mounting hardware
- Verify all cameras are recording properly
- Test motion detection alerts
📅 Quarterly Tasks
- Review and clear old footage (if not auto-deleting)
- Check hard drive health in NVR settings
- Update camera and NVR firmware
- Inspect outdoor cameras for weather damage or corrosion
📅 Annual Tasks
- Change all system passwords
- Review camera placement effectiveness
- Consider upgrading cameras with outdated technology
- Test backup systems (if using UPS or cloud backup)
CCTV Installation Cost in Hyderabad
If you are in Hyderabad and considering professional installation, here are realistic cost estimates based on our experience across thousands of installations:
| System Type | DIY Cost | Professional Installation Cost |
|---|---|---|
| 2 Camera Basic HD System | ₹5,000 – ₹8,000 | ₹10,000 – ₹15,000 |
| 4 Camera HD System | ₹10,000 – ₹15,000 | ₹15,000 – ₹22,000 |
| 4 Camera IP System | ₹18,000 – ₹25,000 | ₹25,000 – ₹40,000 |
| 8 Camera IP System | ₹30,000 – ₹45,000 | ₹40,000 – ₹70,000 |
Professional installation ensures proper camera placement, clean wiring, correct NVR configuration, and no blind spots — which is why most Hyderabad homeowners and businesses prefer it over DIY.
Hyderabad-Specific CCTV Installation Tips
Installing CCTV in Hyderabad comes with unique challenges that generic guides do not cover:
Summer Heat — Up to 42°C
West and south-facing walls get extremely hot in May and June. Always use bullet cameras with a hood on these spots. Dome cameras without shade will turn yellow within months in direct Hyderabad sun.
Monsoon Weatherproofing
Hyderabad receives heavy monsoon rainfall from June to October. Seal all cable entry holes with silicone sealant. Water damage through unsealed holes is the most common reason for camera failure in Telangana.
Power Cuts
Power outages are common in areas like Patancheru, Shadnagar, and outer Hyderabad. Always add a UPS backup — a basic UPS costs ₹3,000 to ₹8,000 in Hyderabad and keeps cameras running for 2–6 hours during cuts.
Housing Society Rules
Many apartment societies in Kukatpally, Miyapur, and Gachibowli have rules about drilling into common walls. Always use dome cameras for apartment interiors — they are compact and societies rarely object to them.
2026 Technology Trends to Consider
➜ Wi-Fi 7 Cameras
Faster data transmission and better performance through walls — ideal for large homes with multiple floors.
➜ Solar-Powered Cameras
Battery cameras with integrated solar panels for truly wire-free operation — great for remote locations in Hyderabad outskirts.
➜ 5G Cellular Cameras
For remote locations without Wi-Fi — 5G cameras provide reliable connectivity for godowns and farmhouses.
➜ Edge AI Processing
Cameras process AI analytics locally, reducing bandwidth and improving privacy without cloud dependency.
Ready to Upgrade Your Home Security in Hyderabad?
Get a free consultation with our security experts to design the perfect CCTV system for your property. We serve all areas across Hyderabad including Kukatpally, Miyapur, Gachibowli, Banjara Hills, Jubilee Hills, Kondapur, Secunderabad and more.
Frequently Asked Questions
Final Thoughts
Installing a CCTV camera system in 2026 is more accessible than ever — with plug-and-play systems that rival professional installations for basic setups. Whether you choose a wireless system for its flexibility or a wired PoE setup for maximum reliability, following this guide will help you avoid the most common mistakes and get the best coverage for your property.
Remember: the best security system is the one that covers every entry point without blind spots. Start with a few strategic cameras, test thoroughly, and expand over time as your needs grow.
If you are in Hyderabad and would prefer a professional to handle placement, wiring, and configuration — Smart Secures offers a free site visit and written quote with no obligation.
📞 Call +91 9346 133 102 or WhatsApp us for a same-day response.
✅ Quick Reference: Installation Checklist
- Choose wired, wireless, or hybrid system
- Purchase cameras, NVR, storage, and mounting hardware
- Gather installation tools
- Plan camera placement using coverage mapping
- Test cameras and software setup before mounting
- Drill pilot holes and install mounting brackets
- Mount cameras and connect power/data
- Weatherproof all outdoor installations
- Set up NVR and configure recording settings
- Enable AI features and motion detection zones
- Configure remote access with strong passwords
- Perform comprehensive system testing
- Document camera locations and credentials
- Schedule regular maintenance